Gluten-Free French Toast

I love breakfast. Leslie Knope from Parks and Recreation perfectly described my feelings on the matter by stating, “why would anybody ever eat anything besides breakfast food?”

Truly, breakfast is the best meal of the day that sadly not all of us eat. I know I’ve personally made up for this fact by making pancakes at midnight or whipping up an egg scramble for dinner. But one of the things I’ve deprived myself of is French Toast. This mostly stems from my sheer laziness in making a paleo-friendly bread. However, my dad recently came to visit me and took me grocery shopping where he insisted I pick-up some gluten-free bread. I try and stay away from grains in general, but I couldn’t say no to having a loaf of (gluten-free) bread in my apartment.

And with gluten-free bread in my apartment comes one of the things I love the most: French Toast. So #treatyoself to some French Toast this week for breakfast/lunch/dinner and bask in its glory.

*I’m really not adding any measurements here since how much batter you make is going to depend on how many slices of French Toast you’re going to make. I made two slices of French Toast for myself, so I just used 2 eggs and a splash of milk until it got to a good consistency, so use your best judgment

IMG_7910

Gluten-Free French Toast

Ingredients
– Gluten-free bread
– Milk of choice such as almond, cashew, or cow’s milk
– Eggs
– Vanilla extract
– Cinnamon
– Butter
– Maple syrup, for topping

Method
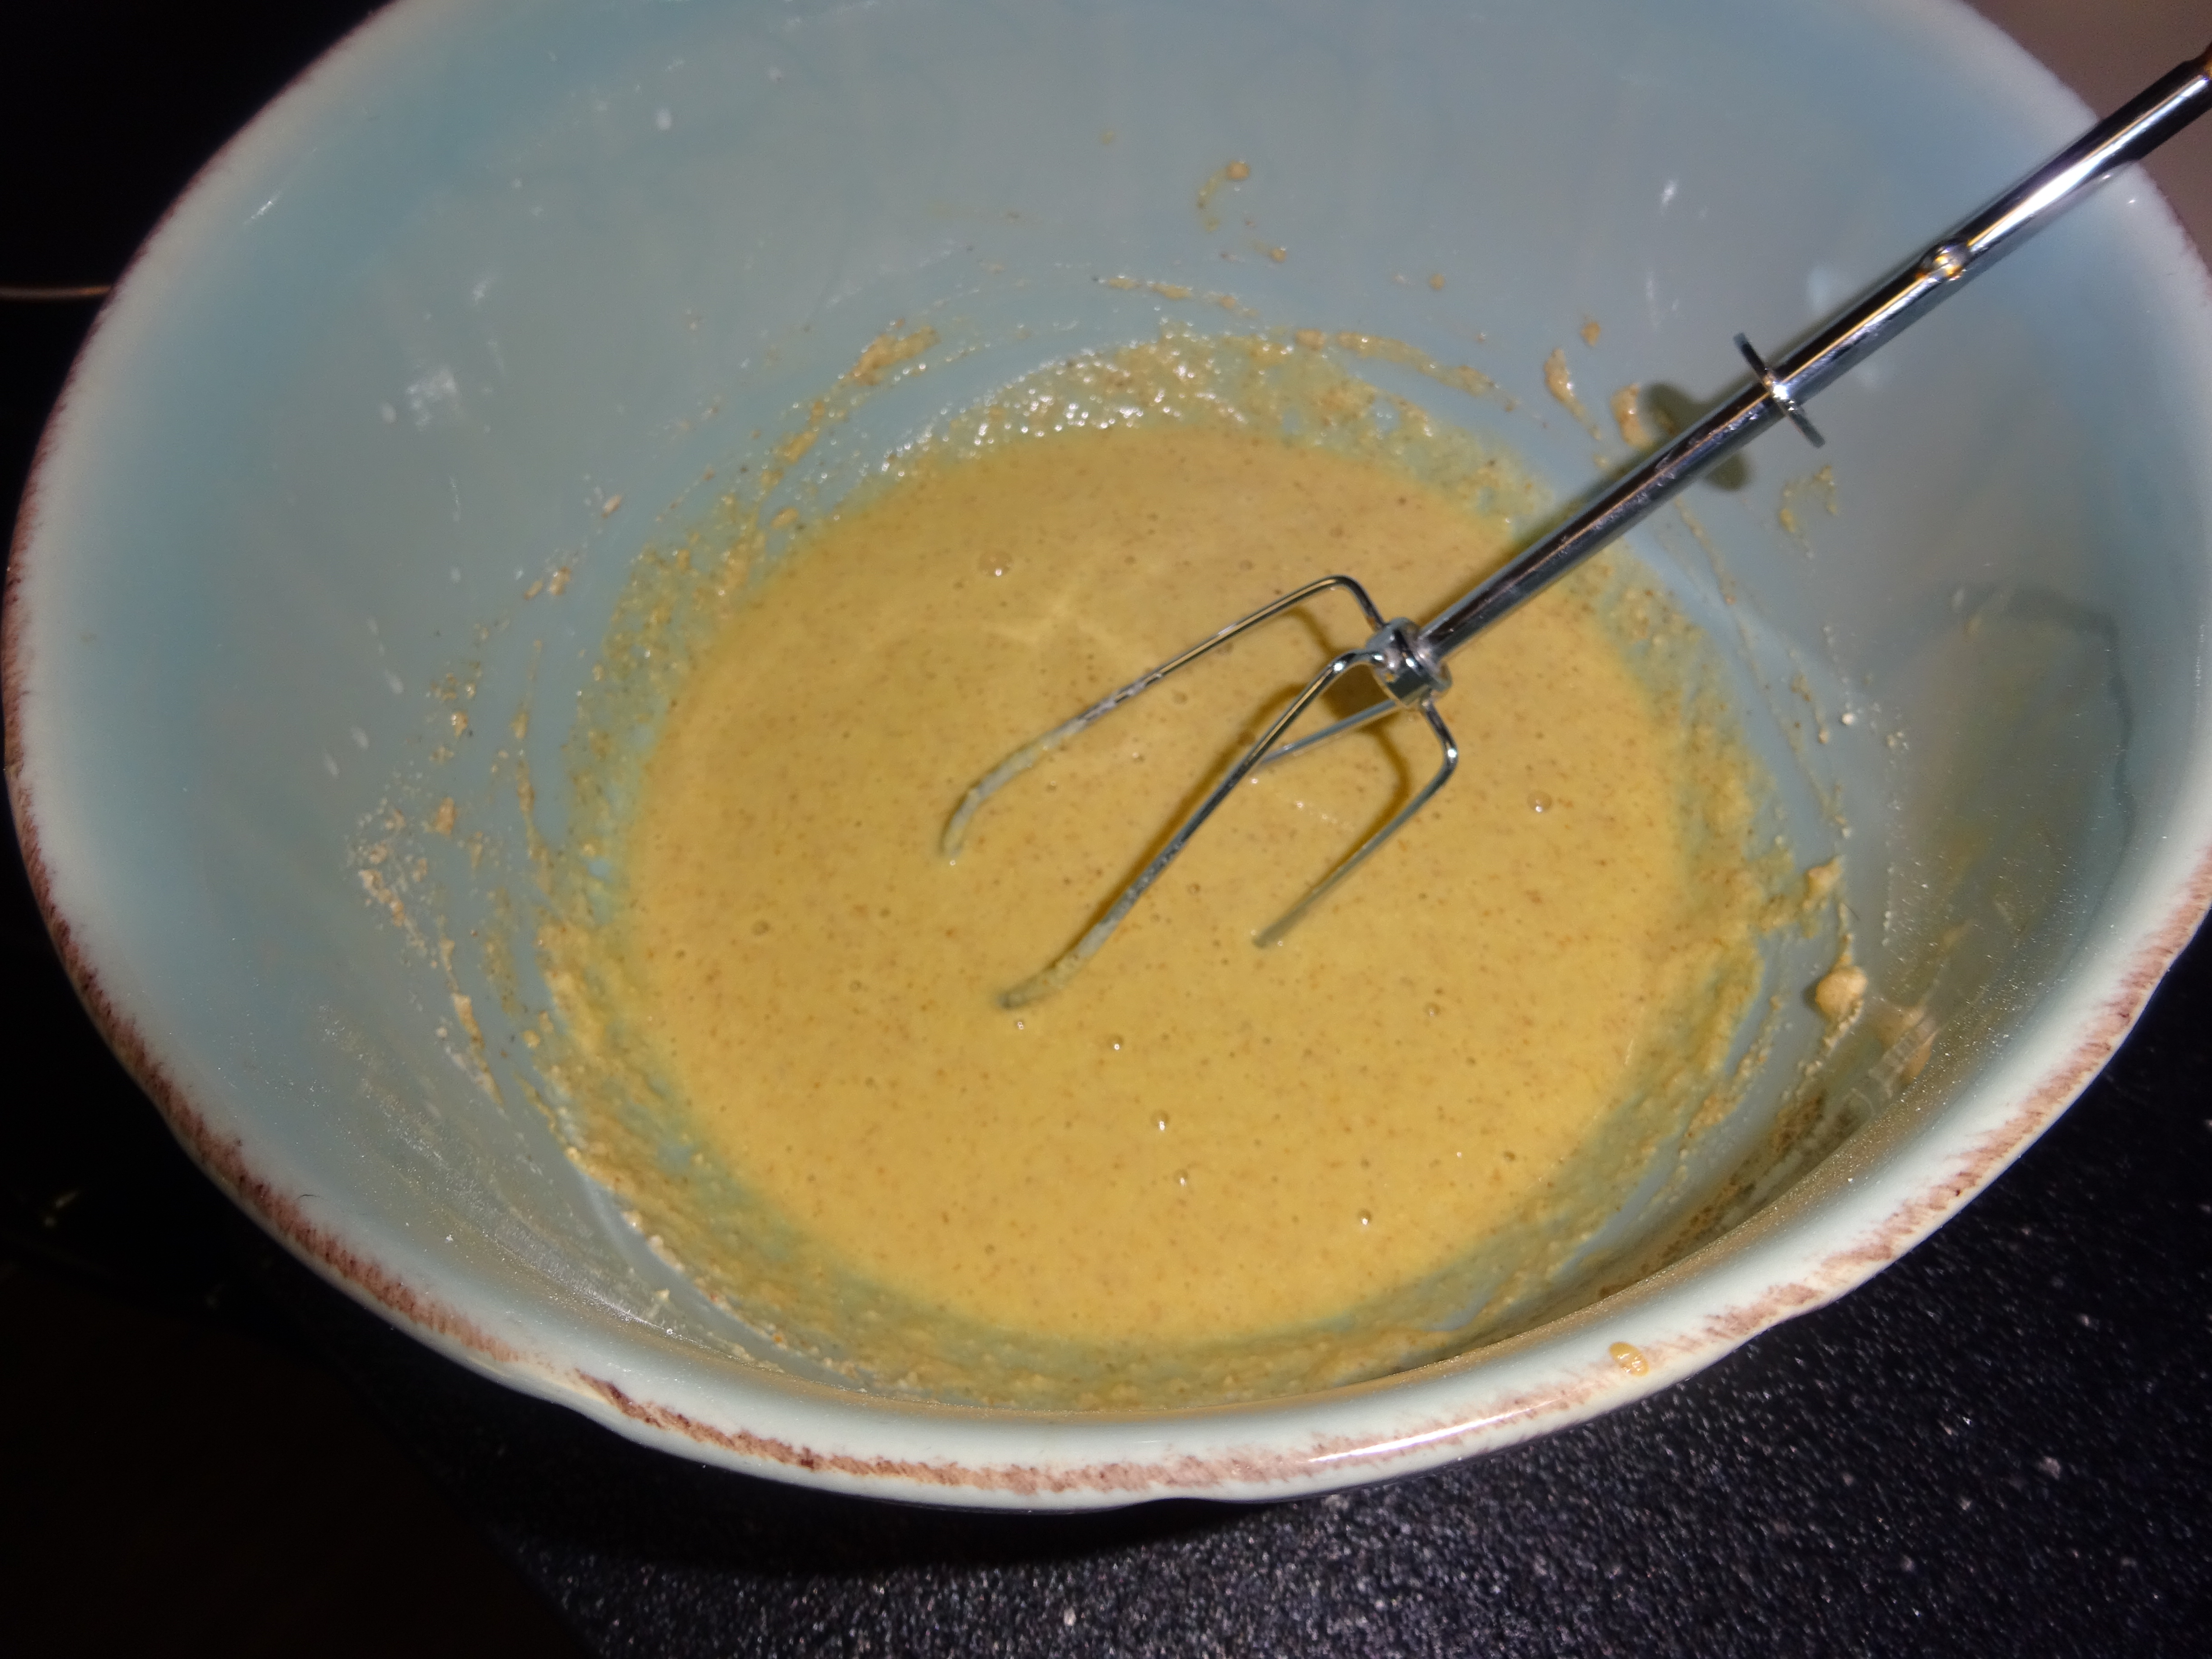
– Make your batter: In a large bowl, add the eggs and the milk. Mix these together and add a touch of vanilla and some cinnamon. This is what is should look like (with some bread in there)

IMG_7908
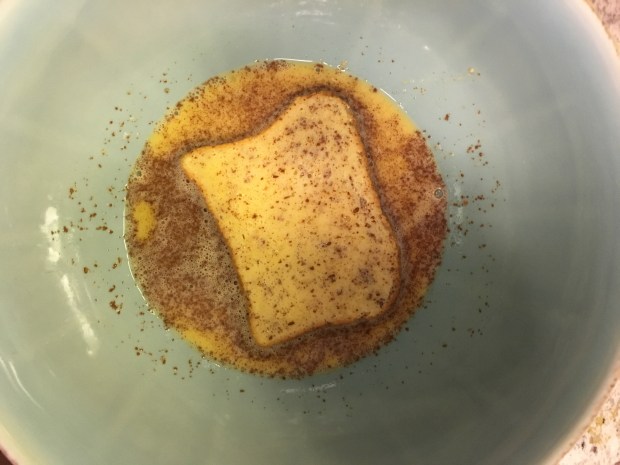
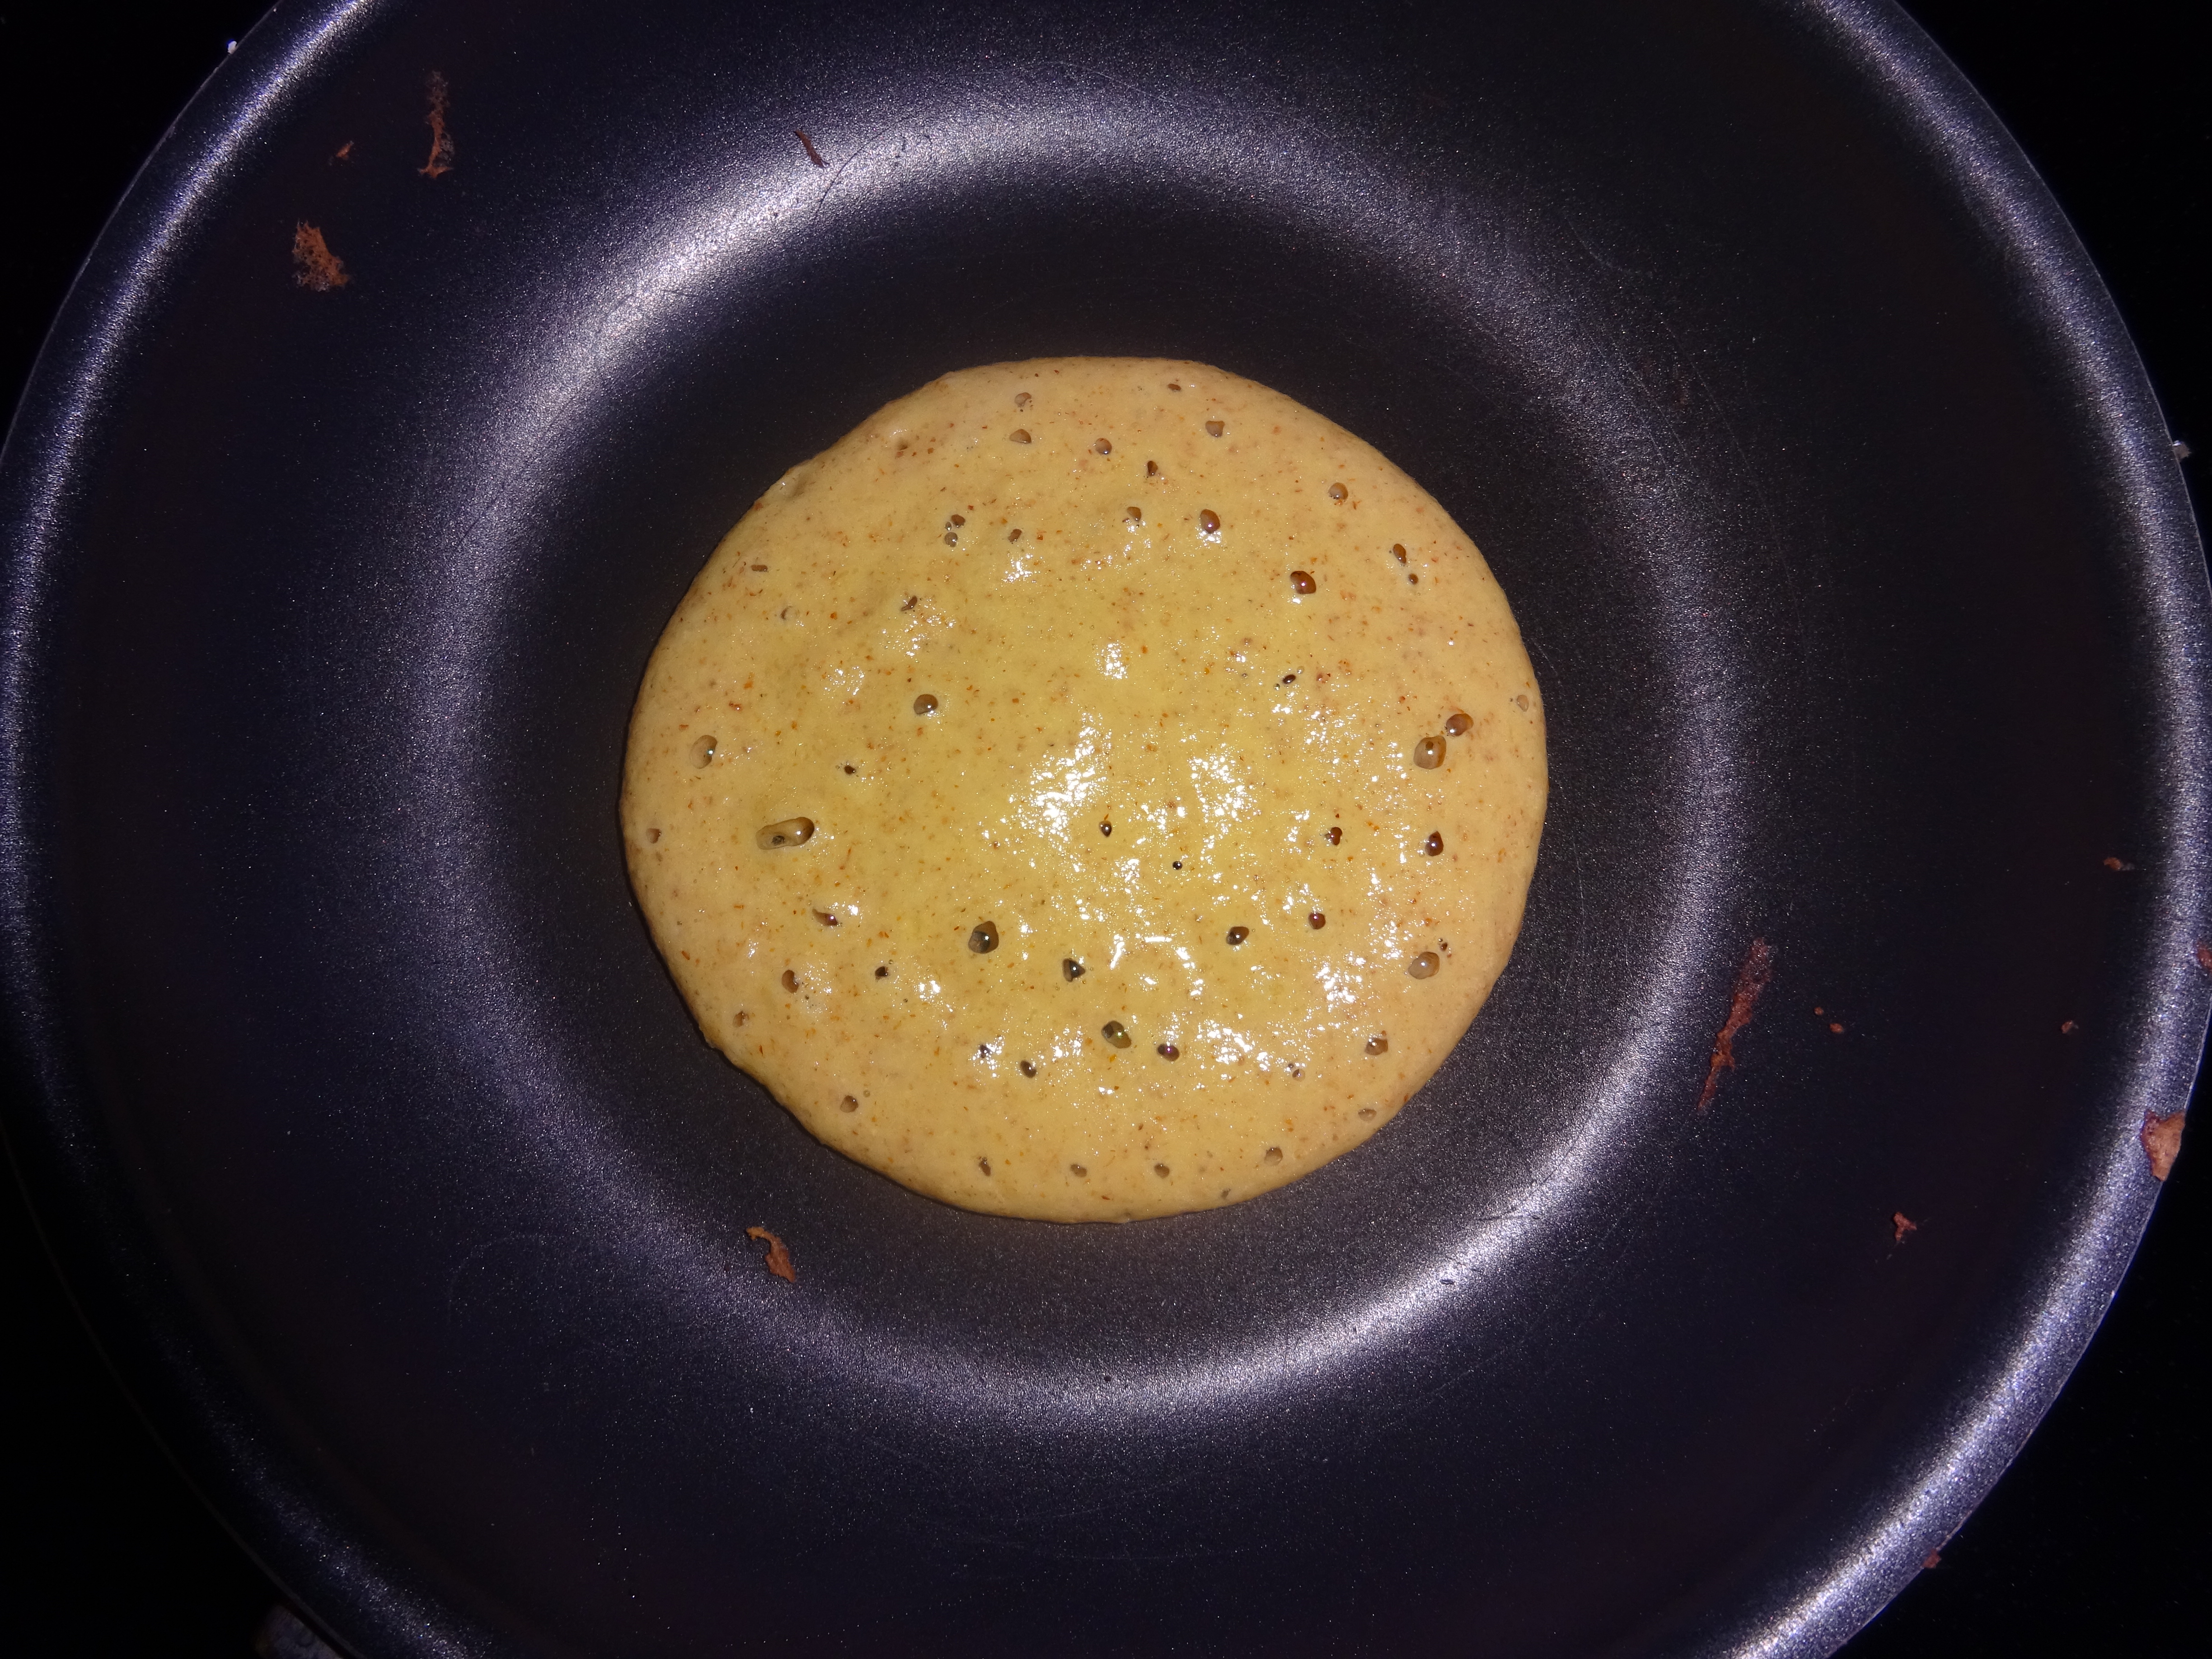
– Heat the pan and add the butter. Start soaking your bread in the mixture.
– Once the pan is hot, add your bread slice and sprinkle and bit more cinnamon on the top part of your bread and start soaking another slice in the batter. Flip the slice to cook the other side and allow each side to brown. Place the French Toast slice on a plate and repeat the process. If you’d like, warm your oven and put the cooked slices on a plate in the oven as you’re cooking the rest of your French Toast (that way they stay nice and warm).

IMG_7909
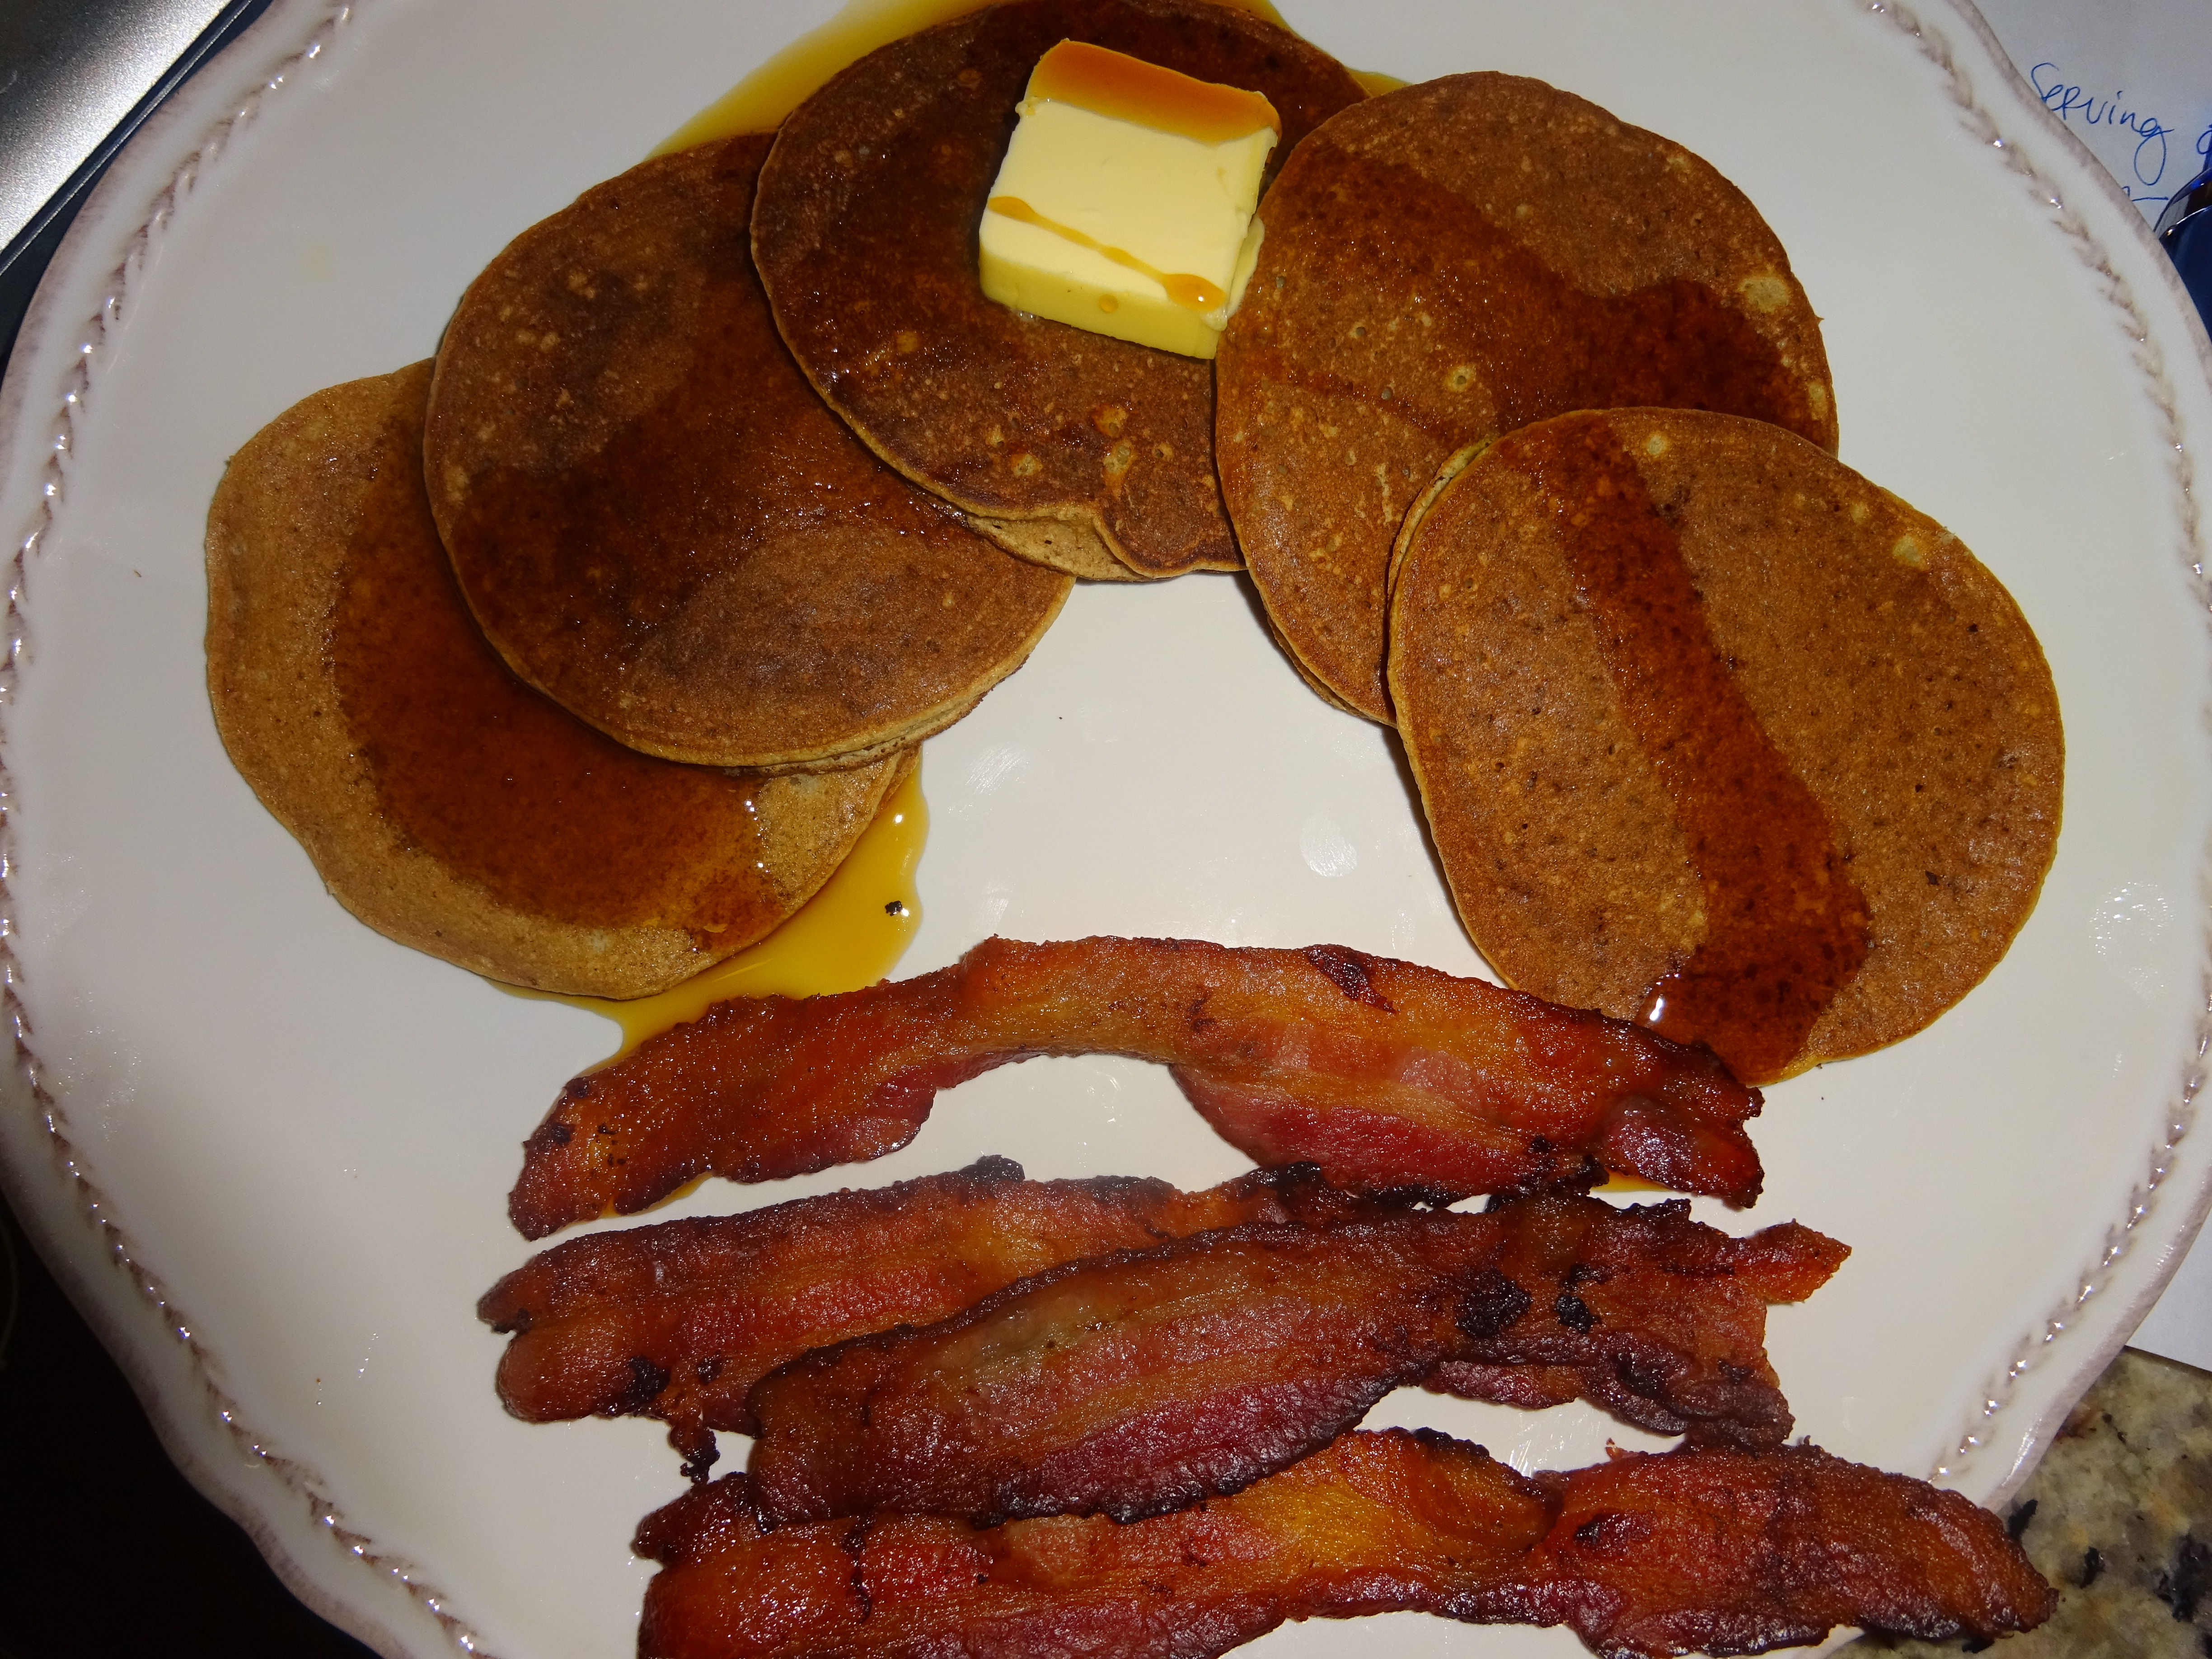
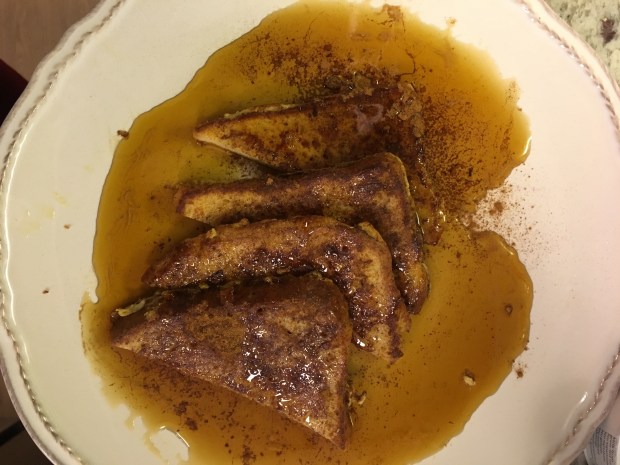
– Plate your French toast and top with maple syrup and more cinnamon if you’d like
– Enjoy!

IMG_7911

If you can’t tell, I really like my maple syrup. I’ve found that adding the vanilla and cinnamon in the batter really gives my French Toast a wonderful flavor. Hope you try it out! If you really feel like getting crazy, you could create a stuffed French Toast by putting a cream cheese filling between two French Toast slices – but I’ll let you be the judge of how crazy you get. 😉

xoxo,
Paige

Steak with Mushrooms and Broccoli

As a self-taught cook, there are several food items that scare me – steak being one of them. I’m not sure if any of y’all feel that way, but it’s always something that I avoid cooking. That is, until now.

I was walking through Whole Foods (as I typically do) and stopped by the butcher. I was between two things – seafood, which I had already passed, or beef. I thought to myself “screw it” and bought a beautiful cut of grass-fed beef, New York Strip to be exact. I picked up some veggies, as well as some gluten-free chicken nuggets (it’s okay to treat yourself!) and went home to cook.

Since I’ve never made a steak, I watched a few videos to get the hang of it. Being from East Texas, all the steaks I’d ever seen be cooked were done on a grill. In fact for a long time, I thought that was the only way to cook a steak. However, I don’t have a grill and I actually really hate food cooked on a grill. I don’t know, something about the smokey taste really turns me off. Anyway, I found this video of the great Gordon Ramsey showing how to cook a steak and followed that method exclusively.

As always, feel free to customize this to your liking! I will say, I apologize for the lack of care I took into make the Bearnaise sauce, which is why there’s a runny yellow substance under the steak, but why there’s nice fresh herbs on top (which was lovely).

IMG_7930
Steak with Mushrooms and Broccoli

Ingredients
– Steak, warmed to room temperature
– Mushrooms, chopped
– Broccoli, cut into florets
– Avocado oil
– Rosemary, fresh and chopped + whole sprigs
– Chives, fresh and chopped
– Tarragon, fresh and chopped
– Butter
– Lea and Perrins Worcestershire Sauce (for mushrooms, optional)
– Salt and pepper
– Garlic, I used garlic powder but fresh is always best

IMG_7922

Method
– Prep everything: chop all vegetables and herbes, make sure that the steak has been set out to reach room temperature
– Cook the broccoli: heat a pan and add a fat of your choice, I used butter. Let get hot and add the chopped broccoli and season with salt, pepper, and garlic. Cook to desired tenderness and set aside on a plate.
– Cook the mushrooms: in the same heated pan, add butter and rosemary sprigs. Let the butter melt and the rosemary cook. Add the chopped mushrooms and season with salt, pepper, and Worcestershire sauce. Cook the mushrooms. Once cooked to desired doneness, put on the same plate as the broccoli and put in a warm stove to they stay warm for serving.
– Heat a cast iron pan and add avocado oil
– Take the steak and season with salt and pepper on each side
– Once the oil is smoking, add the steak
– For a rare steak, only sear each side for 2 min – this is where Gordon Ramsay’s video really helped me – and only flip once
– Flip steak to other side and cook for 2 min for rare, more for other doneness
– Add a knob of butter to the pan and some of the chopped rosemary, let it melt and coat the steak with the butter, herbs, and juices
– Transfer the the steak from the pan to a plate and let it rest for at least 5 min; add chopped chives, tarragon, and rosemary to the top of the steak
– If desired, make a bearnaise sauce or hollandiase sauce
– Take the vegetables from the oven and add to a plate
– After the steak has rested, cut into slices and transfer to the plate with the veggies
– Top with more herbs or the bearnaise/hollandiase sauce
– Enjoy!

Let me know how you like it! I’d also love to hear any modifications you made to this. Happy cooking!

xoxo,
Paige

Bacon Mushroom Cauliflower Risotto with Scallops

I have a rule: anytime I go out to eat I just eat gluten-free. This mostly comes from me just not wanting to be a burden to the people I’m going out to eat with as well as my waiter/waitress. Since I live in Austin, it’s pretty easy to eat gluten-free at just about every restaurant, including Italian. Lately I’ve been going to a place called Taverna that has amazing gluten-free options including pizza and pasta. But my favorite has to be the risotto.

Well – I reimagined risotto in a more paleo-friendly way. And let me tell you – it’s amazing. I kind of just did it on a whim and I honestly don’t even know if this is the proper method for risotto, but screw it – I’ll do it how I like haha. So I hope you enjoy this recipe! It sure was tasty!

10691791_1701047506799467_1593905315_nBacon Mushroom Cauliflower Risotto with Scallops
Ingredients
– Cauliflower, riced
– Butter/olive oil
– 1 Shallot
– Strip of bacon, cut in pieces
– Mushrooms, I cut mine into really small pieces, but you can chop them to your desired size
– Cashew cream
– Scallops
– Garlic powder (or you can add fresh garlic, I didn’t have any on hand)
– Salt and pepper to taste
– Parsley for garnish
* Depending on how big your head of cauliflower is will determine how many people this will serve – adjust your ingredients accordingly.

Method
– Prep everything! Chop your mushrooms, bacon, shallot, and rice your cauliflower in a blender or food processor. If you don’t know how to do this – cut your cauliflower into florets and then pop them in the blender or food processor and process until the cauliflower resembles rice. As well, be sure you’ve made your cashew cream – which you can find a recipe for here.
– In a pan, heat the butter/oil and add the shallot.
– Add the mushrooms and bacon and let them cook.
– Once everything is about cooked, add the riced cauliflower.
– While the cauliflower is cooking, heat another pan and add oil to sear the scallops – this shouldn’t take long at all.
– Cook the scallops until seared on each side and set them aside.
– Add the cashew cream and incorporate it into the cauliflower. I don’t have an exact measurement for this, but make sure to not add too much.
– Add the salt, pepper, and garlic powder to taste.
– Plate the risotto and top with scallops and parsley.
– Enjoy!

Xoxo,
Paige

Hello…it’s me.


Hello world! I must say, it’s been awhile since I’ve been here. When I initially started this blog, I didn’t realize just how difficult it was going to be to go to school full time, work part time, and then try and run a food blog. Needless to say, the beginning of 2015 was a terrible year to start.

Anywho – I’ve since graduated college (yay!) and I’m patiently waiting to start my first ever “big girl” job on January 11th. Since I’ve just been sitting around, I reminded myself that I do have this blog and maybe I should come and check-in on it. So, here I am.

It’s been a really interesting year for me to say the least. Graduating college is weird, not living close to campus is weird, and living as a young adult in the actual city is also weird. I guess growing up in general is pretty weird, which everyone fails to mention. Since I last updated you guys, I had a pretty massive flare of my lupus and had to start back on my medication. This is mostly because I’m a 22 year-old and I liked to drink with my friends and eat food I shouldn’t all without taking my meds (surprise, surprise). As of now, I’m back on Plaquenil and I’ve been diagnosed with Sjogren’s Syndrome – which isn’t so bad, my mouth is just dry a lot. BUT the good news is my lupus numbers are down, so I’ll take what I can get.

With all that being said, I’m really hoping that I can get back into the swing of blogging. I really have missed creating recipes and having a platform to share them on.

I hope everyone had a great holiday season! New Year’s is coming up (which I actually hate NYE, by the way) and I hope 2016 is going to bring great things to you. Stay tuned – I’m going to try and get better about posting on here.

xoxo,

Paige


Baked Salmon with Hollandaise Sauce and Steamed Vegetables

You know when you have an overwhelming craving for something? That for me was hollandaise sauce this week. What could I drench in hollandaise that wasn’t eggs on a biscuit? Considering hollandaise can do no wrong with whatever it is paired with, I decided to put it with some wild salmon. While not visually appealing in my pictures (it was pretty late and I was tired), it tasted like heaven. I paired my salmon with steamed vegetables: mushrooms, carrots, and romanesco which is my new favorite vegetable.

Hollandaise sauce can be a bit tricky. I used this method. I modified the recipe a bit: I added much more lemon (because I love lemon) and cayenne pepper. This recipe makes a lot of hollandaise, so if you don’t want that much, don’t use a whole stick of butter. This method is the best, take it from someone who has tried it the more traditional way.
*Will need an immersion blender or blender of some sort. I would recommend the immersion, but I’m sure you could do this is a regular blender on low.

DSC00255
Baked Salmon with Hollandaise Sauce and Steamed Vegetables
Ingredients
For the Hollandaise
– Egg yolk
– 1 stick of butter, melted (or less or less sauce). You could also use ghee for this, I’m sure it would work just fine
– 2 tsp of lemon juice, more or less depending on how much you like lemon. I added juice from half a lemon
– 1 tsp water
– pinch of salt
*feel free to add pepper or cayenne as well. I did a few shakes from my cayenne pepper shaker.

For the Salmon
– Filet of wild caught salmon. I used the frozen wild salmon from Whole Foods. Be sure it is properly defrosted before cooking
– Avocado oil, or oil of choice
– Garlic powder
– Onion powder
– Dried dill, but feel free to use fresh
– Salt and pepper
– Lemon

For the Veggies
– Your favorite veggies, cut, washed, and ready to be cooked
– Seasonings (if you want); I used garlic, salt, and pepper

Method
Prep everything!
– Wash, cut, and prepare your vegetables
– Make sure your salmon is thawed and ready to go
– Preheat your oven to 350
– Get your vegetables steaming. I have a steamer I use on the oven, but I know that my Dad has one that he can microwave. Depending on what kind of veggies you are using will depend on cooking time. As always, taste as you go. I like my vegetables really tender, but I know some people don’t, so use your discretion. Season vegetables as they steam.
– Place the salmon filet or filets on a baking sheet that has been covered in parchment paper
– Rub the salmon with the avocado oil
– Season the salmon filet(s) with some shakes and sprinkles of dill, garlic, onion, salt, and pepper. Place a lemon slice on each filet.
DSC00254
– Bake the salmon for 10 min. If you have more than one filet, you might want to bake a little longer.
– As the salmon is baking, make the hollandaise sauce via this video. You want to serve Hollandaise as soon as it’s ready, so save the sauce for last.
– Once everything is ready, plate it and enjoy! I had a lot of sauce left over, so I went ahead and drenched my veggies in it.

Let me know how you like this!
xoxo,
Paige

Bolognese Sauce

Hello! Sorry for the lack of posting – school and life have kind of gotten in the way. I’ve still been cooking, though! This is a sauce I like to keep in my fridge for a quick dinner. Sometimes I put it over Spaghetti Squash, sometimes I just eat a big bowl of it alone (because I really like sauce, okay?).

My version of this is pretty straightforward. I will say, I do not have exact measurements for the spices used. Why? Well, I don’t really measure anything when it comes to flavoring. I always taste as I go. This is what works for me and what will work for you too. And you get to eat while you cook, which is always a bonus.

*I made my own tomato puree, which I will have the instructions for. However, you can use store bought and it’ll be fine, I just thought it would be fun to make my own.

Bolognese Sauce
DSC00252
Ingredients
– 24 oz tomato puree or homemade (I used 6 tomatoes but could have used more, mine were small)
– 2 tablespoons tomato paste
– 1 pound grass-fed beef
– Olive Oil
– Garlic cloves
– Onion powder
– Garlic powder
– Salt
– Oregano
– Rosemary
– Basil
– Parsley
– Pepper
*I used all dried spices, however fresh would taste a lot better
*Feel free to add onions, olives, mushrooms, etc. I don’t like a lot of things in my sauce outside of spices, but do what works best for your taste-buds.

Method
For the Tomato Puree
– Pre-heat your oven to about 400 degrees (I have to set my oven a bit higher than normal)
– Cut the tomatoes into wedges and sprinkle with salt, pepper, and olive oil
– If desired, add some garlic cloves – it’ll help add to the garlic flavor of the sauce
DSC00250
– Let roast for about 20-30 min, or until really tender and the skin is easy to peel off (I always to a little test with a fork to see how ready they are, the skin will also get kind or wrinkly)
– Let cool and peel the tomatoes
– Place peeled tomatoes into a blender or food processor with the roasted garlic and blend until a puree is formed.

For the Sauce
– Brown your grass-fed beef in a pot with olive oil and minced garlic. If you wanted to add some onions, this would be the place to do it.
– Once browned, add in the tomato puree and paste. If you find that it’s a bit thick, add some water to it.
– Add your spices! Have fun with it and taste as you go.
– Let simmer for about 30 min, tasting as it simmers to see what you need to add to get the flavor just right. I like to top mine off with a bit of olive oil as well.
– Serve over spaghetti squash, eat alone, or store in jars (like I did) in the fridge for about 5 days. I find mine is okay for about a week.

Enjoy!
xoxo,
Paige

Grain Free Pancakes

It’s a cloudy day here in Austin, which always makes me want to curl up in bed and eat pancakes. Does anyone else feel this way? If anything, pancakes are always a little treat for me every Sunday. I resist the urge for chocolate chip pancakes and settle for some of the blueberry variety. Raspberry pancakes aren’t too shabby either.

I also wanted to post a recipe utilizing the homemade almond flour. Enjoy with a side of bacon and a generous amount of REAL maple syrup (don’t use that fake, corn syrup stuff) and grass-fed butter. Or coconut oil – that would be tasty.

*The recipe I’m posting will make 6 pancakes. Depending on how hungry you are, that can be split between you and someone else. Or just enjoy all 6 on your own. That’s what I did, no shame. But, you can easily double this recipe.

Grain Free Pancakes
DSC00221
Ingredients
– 3/4 c almond flour
– 2 tbsp arrowroot powder
– 1 tsp of coconut flour
– pinch of salt
– 1/4 tsp baking soda
– 2 eggs
– 1/2 c almond milk or your favorite non-dairy milk
– 1 tbsp Grade B maple syrup or honey
– 1/4 tsp vanilla
– 1 tbsp melted butter, ghee, or coconut oil + more for greasing the pan
* For a more savory pancake, omit the maple syrup
* If you’re into cinnamon, that would be a great addition to this recipe
* If using fruit or chocolate chips, fold them into the batter once it’s all mixed

Method
– In a bowl, mix the dry ingredients (almond flour, arrowroot powder, coconut flour, salt, and baking soda)
– In a separate bowl, mix the wet ingredients (eggs, milk, maple syrup, vanilla, melted butter/ghee/coconut oil)
– Pour the wet ingredients into the dry ingredients and mix until well incorporated.
DSC00217
– If you feel like the batter is too thick, add just a splash more of almond milk. Too thin? Add just a little more almond flour.
– Using a 1/4 measuring cup, dip that into the batter and pour onto a heated, greased pan. Use the back of the measuring cup to spread out the batter.
– Flip pancakes once the batter bubbles.
DSC00219
– Keep cooked pancakes in a warmed oven until all are ready (I usually heat mine to 200 degrees). Serve with butter/coconut oil/ ghee, maple syrup, and bacon.

Enjoy! These pancakes are super delicious and I like sweetening with maple syrup to add a bit of a maple flavor already, so you require less maple syrup.

Let me know how it goes!
xoxo,
Paige

Almond Flour from Almond Pulp

It’s only been a recent thing, but I now make my own nut milks. I never really believed anyone when I read that making your own nut milk was “so much better”, but it really is. It is so much better than you could imagine. I don’t actually like store bought almond milk to drink plain, but I’ll drink the unsweetened almond milk I make alone. Yeah – that good.

With that being stated, there’s a reason I typically prefer cashew milk over almond milk – there’s nothing left over. When you make almond milk, you have to strain it and you’re left with a lot of pulp. The first time I made almond milk I felt so wasteful just throwing it away (which is incredibly reasonable considering nuts aren’t cheap).

Anyway, from my last batch of almond milk, I turned the pulp into almond flour/meal. If you bake with almond flour, you know that stuff isn’t very cheap either. Well now you can get almond milk AND almond flour using your bulk almonds! I think for me, raw almonds were $7.99/pound when I last bought them. I spent around $11 on almonds, which I was able to put into mason jars to store (the ones that go up to 1 1/2 cups in measure).

So let’s make some almond flour!

*Use this for all your nut flour needs, adjusting drying time as needed. No need to spend all that money on nut flours when you can make your own as a result of nut milk.
*This is going to take awhile. Be sure you have 4-6 hours to just kinda, hang out. For any college students out there, this is great to do on Sundays when you’re kind of just watching a Law and Order: SVU marathon. Just 4-6 episodes and not only have you watched your favorite show ever, you now get some almond flour out of the deal! Or, you know, you could do it while you’re doing homework/studying (but I suggest the SVU option).

Almond Four
DSC00207
Ingredients
– Almond pulp from almond milk (use my Cashew Milk method, but strain. You can find the nut milk bag I like there)

Method
– Preheat your oven to its lowest setting. For me, this was 170 degrees.
– Empty the contents of your nut milk bag onto a parchment paper lined baking sheet.
– Spread out the contents like so.
DSC00205
– Put into your preheated oven and set a timer for 4 hours.
– Let dehydrate. I you want, you can keep your oven cracked. However, I think it made the process a bit longer for me.
– Be sure you’re checking your flour every few hours. Feel it, see if it’s still moist or not. I’m a huge fan of testing as you cook. If you find it has been 4 hours and it’s still a bit moist, keep it in for an extra hour or so. Mine took closer to 6 since my oven is always a bit cooler than the preheated temp.
– Once your flour is dehydrated, place in a blender or food processor and blend. You want to break-up the big chunks. I used my Vitamix.
DSC00206
– Boom, now you have almond flour! Store in an airtight container and keep in the fridge for good measure.

Enjoy your almond flour! I’m working on a breakfast sandwich recipe using mine, so stay tuned! Let me know how this worked for you, as well as the yummy stuff you made. Obviously, how much flour this will yield will depend on the amount of almonds you used. I got about 2 cups of almond flour from my batch. This is a great way to start building your own stock of almond flour. I find I don’t bake very much, so this will last me awhile!

xoxo,
Paige

Cauliflower-Parsnip Mash

The first time I ever tried a cauliflower-parsnip mash I really hated it. It wasn’t exactly a texture thing, it was a flavor thing. After trying a few more times, I realized that I really, REALLY do not like the taste of parsnips. I can’t describe why, but there’s just something about them that makes me gag.

With that being stated, I’ve tried just making mashed cauliflower and there was just something that was missing. I realize now that the starchiness of the parsnip is necessary for a creamier texture. But how was I going to make this without the strong parsnip flavor? Well, add less (duh) and add more ghee/butter. I’ll never be upset about having to add more fat to a recipe.

*You’re going to need a food processor for this, or you could just use a masher. However, I think the food processor is a lot easier. Also – feel free to boil rather than steaming the vegetables.
*Taste this as you go. Maybe you want to add more butter, maybe you need it to be thinner, maybe you think there needs to be more salt. You’ll never know if you don’t taste as you go.

Cauliflower-Parsnip Mash
DSC00200

Ingredients
– Head of cauliflower
– 1 parsnip (I had a really big one and just used half, you’ll see in the pictures)
– Splash of milk of choice (I used almond)
– 2-4 tablespoons of butter or ghee
– Salt and pepper to taste
*Feel free to play with the flavor. For this, I added some garlic and parsley, but I really want to try it with some homemade ranch seasoning. I really love ranch, okay?

Method
– Cut up and wash your vegetable. Place them in the steamer.
– Steam the vegetables for about 15-20 min. You want them to be pretty tender, so you should easily be able to poke the vegetables with a fork or knife.
DSC00194
– Place the vegetables in the food processor and give them a good pulse. Then add your butter/ghee, salt, pepper, or any other spices you want and almond milk. If you want this to be really creamy, add more milk. If you want more of a potato texture, only add a splash.
DSC00199
– Either serve or store in the fridge for a few days in an airtight container.

That’s it! Hope you enjoy!
xoxo,
Paige

Valentine’s Weekend

Happy Sunday! As you know, yesterday was Valentine’s Day. As a 22 year old single girl, I surrounded myself with the things that I love: friends, food, and good drinks. You’ve got to live a little, am I right?

I’m (currently) living in Austin, Texas. Austin is a wonderful city that is full of character, life, and good food. I took my cousin to one of my favorite spots in town, Picnik. Picnik is a food trailer located on South Lamar specializing in paleo eats and treats. I was SO excited to take my cousin to try her first butter coffee. I ate some spaghetti squash lasagna, blondies, and a buttered iced peppermint mocha. It was truly divine. I also love introducing people to great places to eat. Learn more about Picnik here, and if you’re in the Austin area you’ve absolutely got to check them out!
DSC00178

After our adventure at Picnik, we went to South Congress for a few drinks. One of my favorite places on SoCo is Snack Bar. Snack Bar is a groovy place for incredible food with a local flare. I will say – it is rather difficult to eat strict paleo when I eat out, which is why I rarely do. Since I am 22 and need to live my life, I allow myself to just eat gluten-free when I go places. This makes it a tad easier, but I always try to order a dish that can be made paleo. However, I do have my exceptions, and the pâté at Snack Bar is one of those exceptions. Hands down some of the best I’ve ever had. I spread the pâté over their gluten-free bread and it’s magical. Truly, truly magical. Like I said, sometimes you’ve just gotta live.

After South Congress, I met up with one of my best friends. We hit up our favorite bars on 6th Street and had a great time! I got this great picture of us at a personal favorite spot – Blind Pig. It was a great place to end one of the best Valentine’s Days yet.
DSC00193

I hope everyone enjoyed their weekend! Stay-tuned for more recipes this week!